How To Can Squash
Canning squash is a simple process that allows you to enjoy your homegrown bounty all year round.
Learning how to can squash is a useful skill – no matter if you have extra from your garden, or just find a deal at the grocery store or farmers market.
Canned squash is great to use in any of your favorite recipes, like casseroles and soups, or it makes a quick heat-and-serve side dish to any meal.
In this tutorial, I’ll show you how to do it step by step, including helpful tips and the best safety practices.
Table of Contents
Many types of squash can be safely canned, as long as you follow modern standards and procedures.
Because it is a low-acid food, you must use a pressure canner, as a boiling water bath cannot not get hot enough to kill all of the harmful bacteria.
It’s also important to cube or slice the squash rather than mashing or pureeing it. Otherwise the consistency will be too thick to safely process at home, even with a pressure canner.
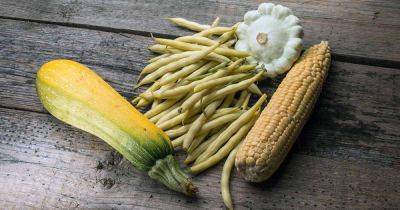
However, summer squash (like zucchini, yellow, crookneck, etc) is not safe for home canning. It is an outdated practice, and was deemed unsafe several years ago.
The reason it’s no longer recommended to can summer squash is that it could get mushy during processing. If this happens, the heat can’t evenly penetrate it to effectively kill botulism.
Related Post: How To Grow Winter Squash At Home
The best types of squash to use for canning are winter varieties, and the most popular options are butternut, pumpkin, or acorn.
The main exception is spaghetti squash, because it’s too dense to safely process in a home canner.
Preparing your squash for canning is easy. First wash them off, using a vegetable brush to remove any caked on dirt.
Then cut them in half, scoop out the seeds and guts, and
Read more on getbusygardening.com


