How To Propagate Bromeliad Pups
Propagating bromeliad pups is both fun and rewarding, allowing you to easily fill your home with beautiful plants.
In this post I’ll guide you through the entire four-step process, from picking the right time for propagation to separating the pups and potting up the babies.
I’ll also list the supplies you’ll need and share my tips for success, so you’ll be fully equipped to propagate bromeliads like a pro.
Table of Contents
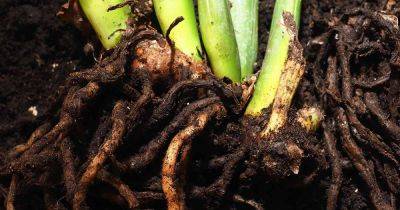
Bromeliad pups are baby plants (aka offshoots) that grow around the base of the main one. Although they can appear at any time, they usually begin to form when the mother is coming to the end of its life cycle.
Sadly, most bromeliad varieties die after flowering, but propagating the pups means you’ll have lots of new babies to enjoy.
You can do this by either by removing them from the mother once they’re large enough, or allowing them to grow after the main plant has died.
Related Post: How To Care For Bromeliads: Complete Growing Guide
The best time to propagate bromeliads is when the pups are around ⅓ to ½ the size of the mother. This is a good indication that they’ll be able to survive on their own. But exactly when you choose to remove them is a matter of preference.
If you leave them attached to the main plant, they will continue to take nourishment from it. As a result, the offsets will mature more quickly.
If you choose to remove them when they are on the smaller side, however, you may find that the mother will devote her energy to producing even more pups. This means more plants for you in the future.
Related Post: Bromeliad Flowers: When, How Often, & How Long They Bloom
Here are the supplies you’ll need – and the simple steps to follow – to safely separate the bromeliad babies from the mother.
Supplies
Read more on getbusygardening.com